

Range Rover Seat Repair Dubai
Repair worn leather, cracked bolsters, split seams, damaged seat covers and collapsed padding with a seat-specific assessment at our Al Quoz 4 workshop. We first identify which layer is damaged, then recommend the least invasive repair that fits the condition of your Range Rover seat.
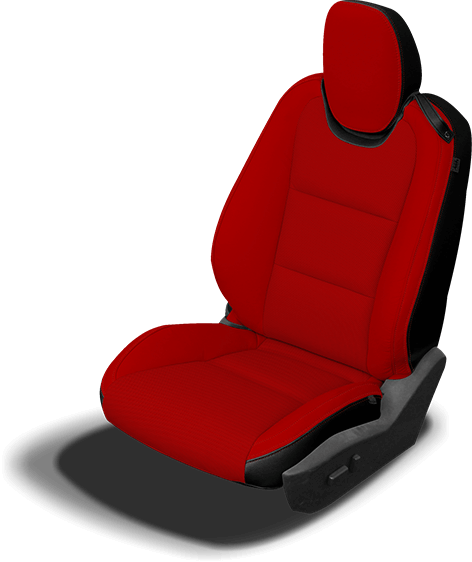
Can a damaged Range Rover seat be repaired?
Often, yes. Surface colour loss, worn bolsters, open stitching, local tears and some foam problems may be repairable without replacing the complete seat. The right method depends on whether the damage is limited to the finish, the covering material, the seam, the cushion or a deeper seat component.
A photograph helps with the first conversation, but the final repair method should be based on the physical condition of the seat and the equipment fitted to that vehicle.
What this service is designed to address
Driver bolster wear
Scuffing, colour loss, cracking and shape changes on the outer entry bolster.
Leather or trim damage
Local splits, scratches, punctures, surface deterioration or damaged seat-cover panels.
Loose or broken seams
Open stitching, frayed thread or a seam that has started separating under normal seat loading.
Uneven seat support
Foam collapse, a softened edge or a cushion that no longer supports the cover evenly.
One visible seat problem can involve several layers
A useful Range Rover seat repair assessment does not start with a generic promise to recolour or retrim everything. It starts by locating the damaged layer. That distinction matters because a surface coating cannot repair weak leather, and a new stitch line will not hold correctly if the material around the seam has already failed.
Finish and colour layer
Light abrasion, dye transfer, fading and loss of topcoat can look severe while the underlying material remains intact. Cleaning and controlled colour restoration may be suitable only after the surface condition is checked.
Leather or covering panel
Cracks, tears, stretched perforations and weakened material need a different decision. A local panel repair or retrim may make more sense than applying more finish over material that has lost strength.
Stitching and seam allowance
When stitching opens, the important question is whether the thread failed or whether the edge of the seat-cover material has torn. Repair planning should account for the material around the seam, not only the missing stitches.
Foam and support below
A cover that looks loose can sometimes be reacting to foam collapse or a change in the cushion shape. Tightening the surface alone can create new tension if the support layer underneath is not assessed first.
Repair, retrim or replace the affected seat section?
These options solve different conditions. The correct choice depends on material strength, the size and location of the damage, previous repairs, the required finish and what can be safely separated from integrated seat components.
| Option | Best suited to | What must be checked first | Why it may not be suitable |
|---|---|---|---|
| Surface restoration | Colour wear, light abrasion or contamination where the material remains intact | Surface cleanliness, cracks, previous coatings, colour and sheen | It cannot restore strength to torn or weakened material |
| Local panel repair | Damage isolated to one bolster, insert or seat-cover panel | Panel edges, seam condition, grain, perforation pattern and adjacent trim | The surrounding material may be too weak for a local result |
| Partial retrim | More extensive panel damage where the rest of the seat can be preserved | Material match, panel construction, access and fitted seat functions | A mismatched material or grain can make the repair visually obvious |
| Cover or component replacement | Widespread damage, unsuitable prior repair or a section that cannot be restored reliably | Exact model, year, trim specification, availability and compatibility | Replacement should not be recommended when a smaller repair is sufficient |
Powered, heated and ventilated seats need a wider check
Range Rover seat trim can sit around electrical adjustment, memory, lumbar support, heating, ventilation, occupancy-related components and restraint-system features.
The repair plan should consider both the visible trim damage and the seat functions that sit under or beside that area. Cosmetic repair and electrical diagnosis should remain separate unless inspection shows they are connected.
Record seat functions first
Before trim work starts, confirm whether movement, memory, lumbar adjustment, heating or ventilation already has a fault. This creates a clear baseline before the seat is disturbed.
Separate trim and electrical issues
A cracked bolster and a non-working seat function may exist at the same time without sharing the same cause. Each concern should be assessed on its own evidence.
Recheck functions after refitting
When access or trim removal affects an equipped area, the relevant seat movements and comfort functions should be verified again after the seat is reassembled.
Common seat-repair mistakes that create more work later
Colouring over a crack
Fresh pigment can make a worn area look better for a short time, but it does not restore material strength. If the leather or covering has opened, the repair needs to address that damage before cosmetic finishing is considered.
Stitching through weakened edges
An open seam can tempt a quick restitch. If the seam allowance has torn or thinned, new thread may pull through the same weak edge. The surrounding material needs to be assessed before a new stitch line is approved.
Pulling the cover tight over collapsed foam
A loose cover is not always a cover problem. Tightening it over distorted foam can change panel tension and may make the seat uncomfortable. The support shape should be checked so the surface and cushion are repaired as one system when needed.
Using household cleaners before inspection
Strong cleaners, alcohol-based products and abrasive materials can change the finish and complicate colour matching. If the seat is booked for assessment, keep the area dry and avoid applying new products until the material and existing coatings have been identified.
Previous repairs are not automatically a problem, but they are useful evidence. Tell the workshop where the seat has been dyed, glued, stitched, retrimmed or treated before. That history can change preparation, material choice and the realistic finish that can be achieved beside older surrounding trim.
A five-step Range Rover seat repair process
The process should make the repair decision clear before work begins. That is especially important when the damaged area has already been recoloured, glued, stitched or treated with interior dressings.
Inspect
Review the complete seat, the damaged area, nearby panels and how the cover behaves when the seat is occupied.
Identify
Separate finish wear from leather damage, seam failure, foam collapse or a concern involving another seat component.
Match
Check colour, grain, sheen, perforation pattern, piping and stitching details against the surrounding cabin.
Repair
Use the smallest suitable repair scope supported by the seat condition instead of defaulting to complete replacement.
Verify
Review the finish, seam alignment, support, seat-cover movement and relevant functions after refitting.
Which seat repair route usually makes sense?
Keep the original panel when possible
This route may suit surface wear, mild discolouration or a local finish problem where the leather or trim material is still sound. Preserving original material can be the least invasive option when the structure below is healthy.
Next step: have the surface checked before applying any dye, filler or strong cleaner.
Repair or retrim the damaged section
This may suit an entry bolster, torn insert, open seam or local panel with damage that is too deep for cosmetic treatment. The repair must account for the adjacent material and how the panel flexes in use.
Next step: send clear photos of the complete seat and close-up damage, then arrange an inspection.
Consider replacement only when justified
Replacement can become relevant when damage is widespread, the existing material is too weak, a previous repair is unsuitable or a compatible part is the better solution. Exact availability and fitment must be confirmed for the vehicle.
Next step: share the model, year and VIN when available so compatibility can be checked.
Colour match alone is not enough on a Range Rover interior
A seat repair can be close in colour and still look wrong. Grain, sheen, perforation spacing, piping, stitch colour and panel tension all influence how the repaired area sits beside the original trim.
Age and sunlight can also change adjacent panels. That means the useful reference is the cabin in front of the technician, not a generic colour name. On lighter interiors, dye transfer from clothing can change the visible tone without the leather itself being structurally damaged.
For perforated or ventilated seat panels, the pattern itself is part of the visual match. A new section that uses the wrong hole spacing, stitch line or edge profile can be noticeable even when the colour is close. The same applies to contrast piping and multi-tone seats. The repair scope should therefore describe exactly which panel is being treated and what surrounding original material will remain.
On an older cabin, a sensible target is a balanced result that belongs with the rest of the interior. That is different from promising that one repaired panel will look factory-new beside material that has naturally aged. Setting that expectation before work starts is part of a professional seat-repair decision.
Colour
Compare the repaired zone with nearby original trim in more than one lighting condition.
Grain
Match surface texture where a panel is repaired or replaced, especially on large visible areas.
Sheen
A glossy patch beside a matte seat can reveal the repair even when the shade is close.
Panel tension
Check that the cover does not bunch, pull or sit unevenly after foam or seam work.
Heat, sunlight, dust and repeated entry all affect seat condition
The outer driver bolster often receives the most repeated contact. Fine dust can become abrasive when rubbed into the surface, and strong sunlight can make colour variation more noticeable across exposed panels. Light interiors may also show clothing dye transfer more clearly.
That does not mean every faded or shiny area needs retrimming. Some concerns are limited to the finish. Others involve weakened material underneath. The assessment should separate the two.
Our workshop is in Al Quoz 4, Dubai, with enquiries from Range Rover owners across Dubai. For broader interior work beyond the seats, see our Range Rover upholstery service.

The vehicle specification can change the repair scope
Range Rover seating varies across generations and equipment packages. Front sport seats, executive rear seats, perforated leather, contrast stitching, ventilation and different trim grades can change access and material matching.
For that reason, the useful booking details are the model, model year, VIN when available, seat location and clear photos. The physical seat remains the final reference for colour, grain, seam construction and previous repair history.
When the issue is not really upholstery
A seat that will not move, loses memory, stops heating, shows an electrical warning or behaves intermittently may need diagnosis before or alongside trim work. Visible leather damage should not be used as an explanation for an unrelated electrical fault.
If the main complaint is powered-seat operation or another electrical concern, our Range Rover auto electrician service is the more relevant diagnostic route.
Make the first seat assessment more useful
Before you bring the Range Rover
- Photograph the complete seat and the damage close up in natural light.
- Include the matching seat on the other side of the cabin for colour context.
- Mention any previous dye, filler, glue, dressing or upholstery repair.
- Report heating, ventilation, adjustment or warning-light concerns separately.
- Avoid applying fresh dressing immediately before the inspection.
What to check at handover
- Look at the repair from several angles and under more than one light source.
- Check seams, piping, perforations and panel edges for consistent alignment.
- Sit in the seat and confirm that support and cover tension feel even.
- Operate the seat movements relevant to the repaired area.
- Ask which cleaning products and aftercare steps suit the completed surface.
Range Rover seat repair FAQ
Can cracked Range Rover leather seats be repaired?
Some cracks are limited to the surface finish, while others extend into weakened leather. Surface wear may be suitable for restoration. Deeper cracking may need panel repair or retrimming. The material strength must be checked before choosing the method.
Can you repair only the driver seat bolster?
A local bolster repair may be possible when damage is concentrated in that area and the surrounding seat cover remains suitable. The technician should also check the foam shape and the seam edges because entry-side wear can affect more than the visible surface.
Can loose stitching be repaired without replacing the seat cover?
Sometimes. The key is whether the thread has failed or the material beside the seam has torn. If the seam allowance is still strong enough, a targeted stitching repair may be suitable. If the edge is damaged, the affected panel may need a different repair.
Can seat foam be repaired if the cushion feels uneven?
Uneven support can come from foam distortion, attachment issues or another part of the seat construction. The cover should be removed only when needed and the support layer should be inspected before deciding on foam repair or replacement.
Do you give a fixed seat repair price from photos?
No fixed price should be assumed from a photo alone. Cost depends on the exact seat, material, damage, required access, repair method and any parts or materials needed. Photos are useful for an initial conversation, with the final estimate based on the agreed scope.
How long does Range Rover seat repair take?
There is no single repair time for every seat. The scope can range from surface restoration to panel retrimming or work that needs more disassembly. Timing should be confirmed after the seat and required materials have been assessed.
Can a seat repair affect heating, ventilation or airbags?
Those systems can be integrated into or around the seat, depending on the vehicle. Relevant functions should be recorded before work, and safety-related seams or restraint components require vehicle-specific care. A warning light should be diagnosed rather than treated as an upholstery issue.
Send the seat photos before you visit
Share the model, year, seat location, clear photos and any previous repair history. We can use that information to start the conversation, then confirm the appropriate Range Rover seat repair scope after inspection in Al Quoz 4, Dubai.